Procedural Notes
- Adjust the photogate attached to the dynamics track to the correct height. The small fence has narrow pickets on one side and a single 5cm-wide blackout on the other. Make sure the gate is being tripped by the wide blackout strip, not the narrow pickets.
- Now adjust the photogate height again. There is some tiny logo print on either side of the blackout band. These tiny bits of print are enough to trip the gate before and/or after the blackout strip, which means you will get multiple velocity readings. Because the print is really, really tiny, you get a huge (and inaccurate) velocity value when this happens.
- It does not really matter which gate is plugged in to DIG1 or DIG2 of the LabQuest, but it will be much less confusing if the upramp gate is DIG1 and the downramp gate is DIG2. The LabQuest will automatically use a 5cm gap to match the fence, but the Photogate Mode must be changed to Gate timing, instead of the default Motion timing mode.
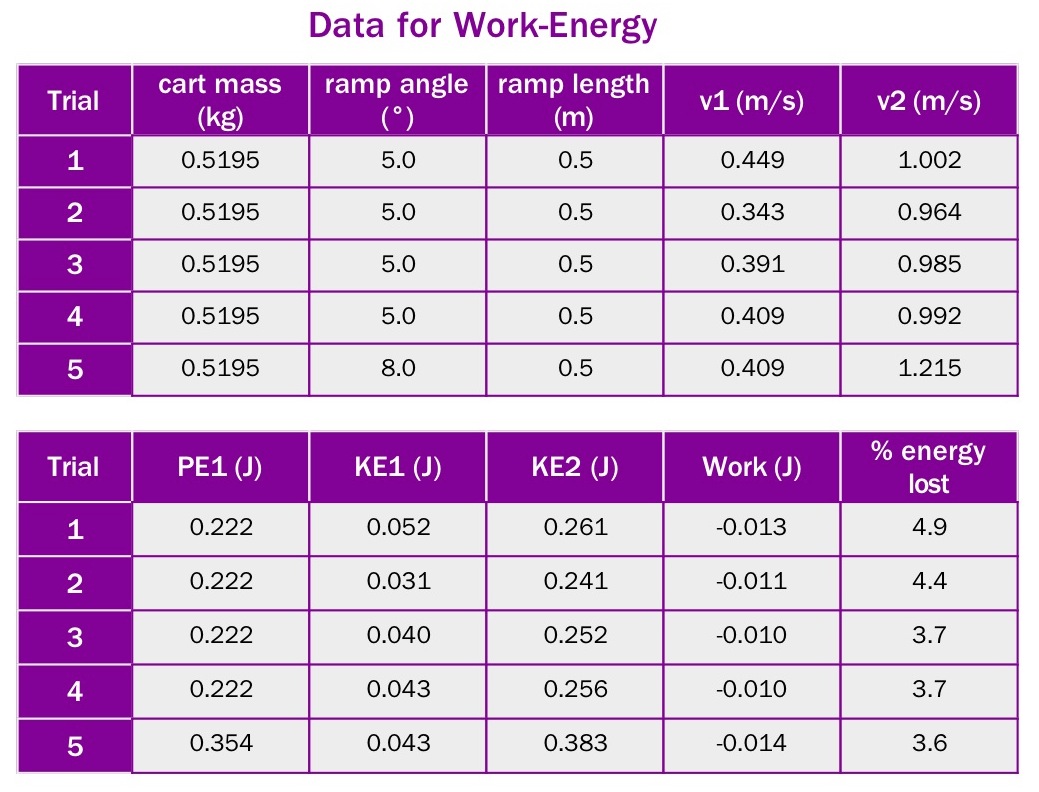
- Results for the incline at 5° were reasonably consistent over multiple trials:
0.34 m/s < v1 < 0.44 m/s, and 0.96 m/s < v1 < 1.00 m/s. Energy loss comes in at about 4%. - No real care was taken to be sure to release the cart from the same position on the track each trial. If you instruct the students to align the front edge of the cart at the same (arbitrary) spot for each release, they should get very consistent results over multiple trials.