Introduction
Stellarium is a free, open-source planetarium program available for download. If you have your own computer, you should consider installing it. If you have your own copy installed, you can work on lab exercises at your own convenience, review or double-check your lab answers before quizzes, or just play around with it. The program can be downloaded at:
Stellarium.
This program is installed in the computer lab LSC 174, so you are free to use it any time the lab is open.
The advantages of using a computer-generated sky are numerous. First, and most obviously, it's never too cloudy to observe the sky on the screen! Another powerful advantage is time. We can examine the sky on any day, at any time: past, present, or future. We can watch the stars and planets move quickly across the night sky in a way that would not be possible outdoors, or even with a professional telescope. We can change our location, and see the sky from parts of the world we have never visited...or from other worlds entirely.
Objectives
- Become familiar with the Stellarium program and its user interface
- Define and distinguish between systems of astronomical coordinates
- Examine the position of the sun in the sky over the course of a year
Procedure
Launch the Stellarium program. When the program has loaded, your screen should show you located in a field of grass, facing south. You have two toolbars that you activate by moving the mouse over their locations. At the left edge of the window, towards the bottom, you will find a vertical toolbar with configuration windows for setting location, date, and viewing options. There is a horizontal toolbar along the bottom left edge as well. This has toggles for the most common viewing options, as well as time controls.
You can spend a few minutes clicking around, just to see what this button or that toggle does.
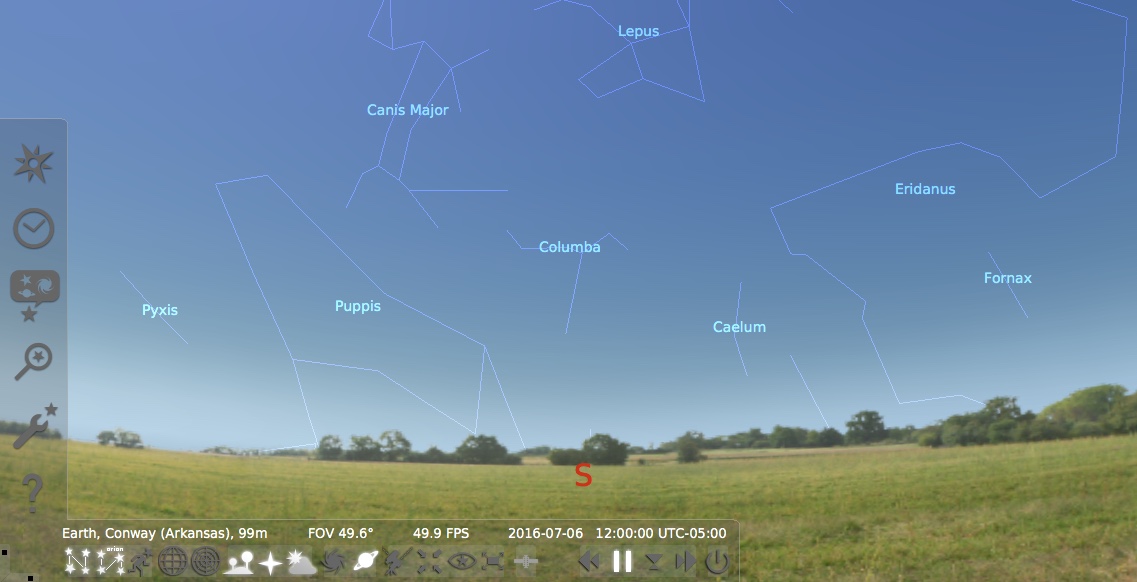
- Set your location: Click on the Location Window icon (vertical toolbar, top icon). There are many ways to specify where you are, but start by doing the fastest thing. In the search box, start typing "Conway." By the time you are three letters in, you should see your location list has been whittled down to just a few places, and you can select Conway, AR. Notice on the map that your red location arrow is correctly pointing to central Arkansas, and you can close the location window.
- Set your time: Click on the Date/Time Window icon (vertical toolbar, second icon). It should initially display the current and correct date and time. Let's go ahead and see the eastern sky earlier this morning. Change the time to 6:00AM, and notice how dramatically your view changes. Go ahead and close the date/time window.
- Return to right now: Activate the horizontal toolbar by mousing over it. The icons on the right end of the toolbar control the passage of time. Click on the "Set time to now" icon, or just type the number 8. You will notice that there are keystrokes which correspond to these toggles, and you will probably find a few that you use frequently−knowing a few keystrokes can be a real timesaver.
- Wander around: Explore your landscape. You can navigate using the mouse or the arrow keys. Spin around, look up, look down.
Astronomical Coordinate Systems
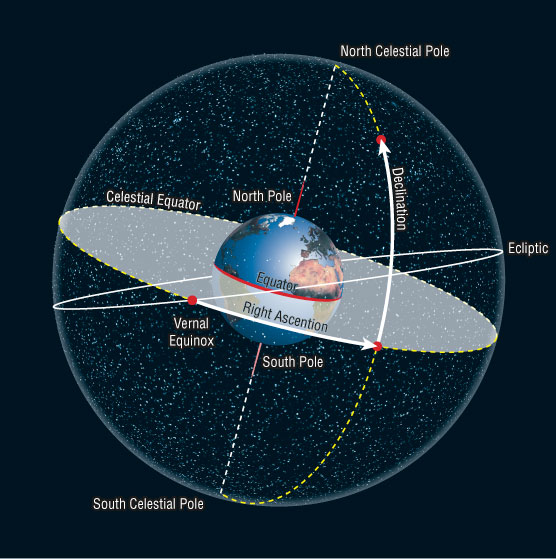
There are several systems that can be used to locate objects in the sky. We will distinguish here between two coordinate systems: azimuth/altitude (Az/Alt) and right ascension/declination (RA/DE). Either one of these systems is analogous to using x- and y-coordinates on a piece of graph paper. They are two dimensional systems, which means that they can tell you where to look in the sky to find an object, but not how far away that object is from the Earth.
|
|
- Turn and face north: Toggle on the Azimuthal grid (command keystroke z), look up a bit, and examine the coordinate system. Azimuth is the angle measured in a horizontal circle, around your horizon. Due N = 0°. Head around the circle, and E = 90°, S = 180°, W = 270° and back to N = 360°. Altitude is the angle measured from the horizon (0°) to the zenith (90°, or directly overhead). Thus, any point in the sky that you can see can be specified by telling you which direction to face (az), and how high up to look (alt).
- Set your time for today: (07/06/16), at 9:00PM (21:00). Locate the star Polaris, and record its az/alt coordinates (click on the star, and notice the information that appears in the top left of your screen). Pay attention to how these coordinates correspond to the star's location in the sky.
- Toggle between mounts: Notice the difference between the equatorial and azimuthal mounts! The azimuthal mount parallels the az/alt coordinates. The equatorial mount makes no sense if you imagine you are outside looking at the sky with your naked eye, but makes sense if you imagine that you are looking through the eyepiece of a telescope. Many telescopes are mounted parallel to the celestial equator, which makes adjusting to find objects easy using RA/DE coordinates. Does changing the telescope mount change the actual location of the object?
- Toggle between grids: Turn off the az/alt coordinates (z), and toggle on the equatorial grid (command keystroke e). You are now looking at the right ascension/declination coordinate system. Record these coordinates for Polaris, and notice that RA is not given in degrees. Always use the J2000 coordinates for RA/DE.
- Set the day and time: Change the date to today (07/06/16), at 9:00PM (21:00). Locate the bright star Acturus in the western sky. Record both its Az/Alt coordinates and RA/DE. Move forward in time to 10/01/16 at the same time, and record the positions. Note that even if the star dips below your viewing horizon (alt < 0°), its position is still displayed. Continue to advance in three month increments for an entire year. Construct a table in your lab notebook to record your data.
Date |
Azimuth and Altitude |
Right Ascension and Declination |
Az |
Alt |
RA |
DE |
| 07/06/16 |
|
|
|
|
| 10/06/16 |
|
|
|
|
| 01/06/16 |
|
|
|
|
| 04/06/16 |
|
|
|
|
- Change your location: Return to the original date (07/06/16) and time (21:00). Remain centered on the star Arcturus, but change your observation location. Pick any place you like: New York, Chicago, Paris...literally anywhere. Note your location, and record one more time the Az/Alt and RA/DE coordinates for the star. For the location you chose, is Arcturus visible above the horizon?
- Really change your location: First, return to your default location (Conway, AR). In the Location window, notice that you are not limited to staying here on Earth! Go to Mars. Yes, Mars. The program will preserve your latitude and longitude, and place you in the equivalent location on whatever planet you select. Have the RA/DE coordinates of Arcturus changed? Where in the Martian sky does Arcturus appear?
- Wow, what does that mean? You have just demonstrated the difference between the coordinate systems! Notice that Az/Alt depends entirely on where you are located, and RA/DE does not. Relating this back to question 07, if you were an astronomer here in Arkansas who needed to tell a colleague at Kitt Peak (in Arizona) about a sky object, how would you choose to communicate its location?
Sunrise and Sunset
We all know that the sun rises in the east and sets in the west, right? Let's examine the position and time of the rising and setting sun over the course of the year, and see how true that is. Toggle back to Az/Alt (z) coordinates for this exercise.
- Find the rising sun: Set your date for 09/21/16, and find the rising sun. Guess at the time, then refine your time until the sun has an altitude of 0°. Adjust the time in seconds to get as close as you can, but because you cannot adjust time in smaller than 1 second increments, understand that you will probably not be able to obtain an altitude of precisely 0°0'0". Get as close as you can, and record the time and both azimuth and altitude coordinates.
- Find the setting sun: Without changing the date, advance the time to sunset. The setting sun will again have an alt = 0°. Record the time and Az/Alt coordinates.
- Change the date and repeat: Record the sunrise and sunset times and coordinates again on 12/21/16, 03/21/17, and 06/21/17. You should construct a table in your notebook so that you can compare these data easily.
Date |
Sunrise |
Sunset |
Time |
Az |
Alt |
Time |
Az |
Alt |
| 09/21 |
|
|
|
|
|
|
| 12/21 |
|
|
|
|
|
|
| 03/21 |
|
|
|
|
|
|
| 06/21 |
|
|
|
|
|
|
- Does the sun rise due east (az = 90°) every day? Set due west (az = 270°)? On which day does the sun rise farthest to the north (smallest azimuth, or north of east)? On which day does it rise furthest south (greatest azimuth, or south of east)?
- Why look at the sun on those days in particular? Why not four other random days chosen three months apart? Note the significance of each of these particular dates. See Figure 0.10 (page 10) of your textbook.
- Correlate the data to the dates: What is significant about the specific dates we selected? For example, note what is similar in your data about 03/21 and 09/21, and what it means (and what about 06/21 and 12/21?).
- Compare to Arcturus: Why didn't we use the same set of dates for our observations of Arcturus?
|